Saturday, December 22, 2012

Cinnamon Stars

Is there a cookie from your childhood that makes you think of your Grandma?  This is mine.

There were always cookies at Grandma's for Christmas but when you're fighting with 15 other Grandkids plus Aunts and Uncles, there seemingly was never enough.  But you wanna know how good these cookies are?  They were good enough that I would brave the scary dark "under the stairs" shower in the basement, sneak past the weird smelling mealy worms Grandpa used for fishing, and find the holy grail of freezers....that guy was STOCKED with (well mostly fish) but more importantly bags and bags of cookies!!!! 

These cinnamon stars are pretty delicate, so they were always perfectly on top....ripe for the picking! :)  I can't tell you how many I sniped from in there, but let's just say I always got a few cinnamon cookies, even though I'm almost at the bottom of the Grandkid totem pole. :)

You should make these....but look out for sneaky kid fingers swiping a few extra ;)

Cinnamon Stars

What's In It*:
2 eggs
1 c + 2 T sugar
2 T cinnamon
1 t baking powder
1/3 c + 4 1/2 T flour

What To Do With It:
Preheat over to 325 degrees F. 
Beat eggs in mixer.  Add sugar and beat for 10-15 minutes (I always do 12 1/2 min).  Mix in the dry ingredients by hand.

Drop by heaping teaspoonfuls onto cookie sheet.  

Bake 8 min.  

Allow to cool on pan for a minute or two, then transfer to cooling rack. 

My Grandma always put a dollop of simple powdered sugar/milk icing in the center, but I don't think they need it so I don't.  Do what'ch'ya feel. :)

*I love the unique measurements for these cookies.  I can just imagine my Grandma's Grandma in the kitchen working out the recipe...always makes me smile! :)

Lemon Surprise Crackles

Surprise crackles have always been a huge favorite for Super Man and me.  We don't always have the same taste when it comes to cookies, but these cookies are common ground...and that means you better snag some for yourself or you're outta luck. :)

Well, this year with the chocolate pomegranate cookies being added to the mix along with the traditional chocolate chip, buckeye balls, chocolate covered pretzels, peanut clusters, chocolate mints, etc etc etc....I thought I'd mix it up a bit and try some Lemon Surprise Crackles.  You already know that I'm a lemon junky...but these are SO GOOD!  I can't believe I have never made them before....yummmpppphhhh....oops, I got crumbs on my keyboard. :)

Make these!
Lemon Surprise Crackles

What's In It:
1/2 c butter, softened
1 c sugar
1/2 t vanilla
1 egg
1 T lemon zest
2 T lemon juice
1/4 t salt
1/4 t baking powder
1/4 t baking soda
1 1/2 c flour
1/2 c powdered sugar (for rolling)

What To Do With It:
Preheat oven to 350 degrees F.  

Cream butter and sugar until light and fluffy.  Add vanilla, egg, lemon zest, and juice.  Add all dry ingredients and mix until just combined.  Chill dough for at least 2 hours.  

Pour powdered sugar into a bowl.  Roll a heaping teaspoon of dough into a ball and roll in powdered sugar. Place on lined baking sheet, repeat.  I only bake 12 at a time to make sure the cookies don't run into each other.  

Bake 9-11 minutes or until cookies are cracked on top and the edges just start to brown.

Allow to cool on sheet for 2-3 minutes before transferring to cooling rack.

Yields 2-3 dozen   

Ginger Snaps

I have never in my life made a gingerbread man.  Can you believe that?!  I guess I'm more of a sugar cookie girl and while I like ginger snaps, I only really ever eat one or two.  But that's alright...it leaves more for everyone else. :)

These guys are a thinner cookie with a little crispiness and a little chewiness - just right. :)
Ginger Snaps

What's In It:
3/4 c shortening
1 c sugar
1 egg
1/4 c molasses
2 1/2 c flour 
2 t baking soda
1 t ginger
1 t cloves
1 t cinnamon 
1/2 c sugar (for rolling)

What To Do With It:
Preheat oven to 350 degrees F. 
Cream shortening.  Add sugar, egg, and molasses.  Mix well.  Add baking soda and spices.  Add flour and beat until smooth, mixture will be very stiff.
Roll a heaping teaspoon of mixture into a ball and then roll in sugar.  
Place on lined baking sheet.  I do 12 per sheet. 
Bake 10-12 minutes.  

Yields 2-3 dozen

Check out my helpers!
Ze-Ra was a huge help and actually rolled out over half of the cookies! 
Te-Man did his part too - somebody's gotta eat 'em! :) 

Friday, December 21, 2012

Yer looking a little long in the pants....

So let's just start this out by saying that I am not short.  I am 5'7" which is a very respectable height.  Why is it then that I regularly can only find pants that look like this?!
 
What do short people do?!

Maybe you haven't heard, but I'm a little stingy with the ole wallet and I'm not about to shell out even more money on some pants that already cost more than I think they should, to have them tailored to fit the way they should've straight from the store!

So...I take matters into my own hands.

How to Hem Your Pants while Keeping the Original Seam
First, you'll need to determine how much you're going to need to shorten them.  While wearing the pants, fold the bottom hem up until the pants are the desired length (See my right leg in the above pic, I had already folded it, but then realized that I should take a picture of the original length and while I was messing around with the camera, the fold fell).  Take them off carefully so you don't disturb the fold (you could even get help here and have someone pin them in a few spots while you are wearing them), and measure the distance from the bottom to the original hem. (Mine was 3 inches)
Now pin the jeans 1/2 of that distance (I pinned mine a to 1 1/4 because the original seam on these pants is pretty wide, but for all of the other pants I've done, I've measured and pinned at 1/2 the original distance).
Using a thread that matches the original hem thread on the pants, sew just to the right of the original hem, all the way around the pant leg.  I am not sewing on the thread line, but instead just to the right of where the light and dark fabric meet.  
Fold the unused flap of fabric down to the original hem and pin in a few places.  
With the outside of the pants face up, sew as close to, or on top of, the original hem as possible and sew all the way around each pant leg.  This step isn't mandatory, but it helps to keep the hem from curling during washing, which would then require ironing after each wash...and I don't iron. haha
Here is what my seam over/next to the original looks like.
You can then trim off the excess fabric from your "fold", or in my case it wasn't peaking out the bottom of the pants, so I just left it intact.  This way I wouldn't have to worry about pulling off fraying bits of jeans for a few washes.  

There ya go!  They are now just perfect with my flats or my kitten heels (cause we all know how often I wear heels...hahahahaha). 


Pimento Cheese

Our Granny lived in Oklahoma City when we were growing up and we lived in rural Central Illinois and then even more rural Southern Illinois.  We would make the drive to see her at least twice a year and that 8-10 hour car ride (depending on how many times Hit Girl and I would make Super Dad begrudgingly stop for potty breaks) was torture at first, but after so many years it became almost nostalgic....well as much as a car ride can be for someone that gets so car sick. :)  

There was always a crazy amount of food to eat at Granny's house.  In fact, it seemed that we almost planned our trip around where or what we were going to eat while we were there.  One thing that was sure to be on the list was pimento cheese.  I don't remember much about it because I was not a fan....but Super Man on the other hand would get himself the container and sleeve of Ritz and he was happy. 

It wasn't until this past June when the Z-Squad was smack in the middle of our 3 week camping trip that Wolverine suggested we have Pimento Cheese.  I was reluctant, I mean isn't it just orange weird tasting cottage cheese?  Well, apparently the 10 year old me and the 30 year old me have different palates.  WOW - it was delicious!

Hmmm....I smell a challenge. :)  I would say that 99% of the time when I purchase something I ask myself....could I make this?  Quickly followed by...could I make this better?  

Yes....Yes I can. :) 
Be sure to serve it with some "Ritz" crackers
Pimento Cheese

What's In It:
10oz sharp cheddar cheese, shredded
1 4oz jars pimentos, drained
1/2 t powdered mustard
1/2 t onion powder
1/2 t garlic salt
1 t horseradish sauce
1/2 t steak sauce
2 1/2 T mayo (I use Duke's)

What To Do With It:
Mix together, process using a food processor to desired consistency.


Thursday, December 20, 2012

Tomato Soup Mac & Cheese

I am a tomato soup snob.  I don't mean to be, but I am...and I blame Super Mom. :)  Super Mom spoiled us rotten when we were kids with home made everything.  I say that, but I don't think you understand....I didn't even know that you could buy tomato soup or jam in the store.  I didn't have store bought of either of those until college (and boy was I glad we had homemade!).  I was so jealous of the kids that had kudos bars or star crunches in their lunch boxes, I mean here I was with homemade cookies or chocolates...man I had it rough.  

When she did buy store bought stuff, even then we were spoiled.  We would only occasionally have mac and cheese but when we did, you could bet it was going to be Velveeta Shells and Cheese.  I don't know what kind of crazy chemical concoction they put in that weird cheese product, but man....there is nothing like it...well, almost. :) 

So, imagine your most favorite tomato soup all hot and steamy from the stove and then pair it with the all time best comfort food of grilled cheese. Now imagine it in one dish...stock full of creaminess and cheesiness, and that rich tomato flavor....sigh.  
Tomato Soup Mac & Cheese

What's In It:
1 lb pasta (I use bow-tie or shell)
1 qt tomato soup*
2 c milk
8 oz cream cheese
10-12 oz shredded cheddar
1/2 t garlic salt
1/2 t onion powder
1/2 t pepper
1/2 t mustard powder

What To Do With It:
Boil pasta for 1/2 the recommended time.  Drain and return to cooking pot.  Mix cream cheese into hot pasta.  Add everything else.
Pour into a baking dish. This fills my 9x13 baking dish to the brim.  I have also halved this recipe and it was worked great as well, but our soup comes in quarts, so I usually just make the full batch.  

Bake at 400 degrees F.  40 minutes covered and 15 minutes uncovered.

*Be sure you are using a very tasty soup here.  It will make up a good portion of the flavor.

Overnight Cinnamon Rolls

Do you want to wake up to amazing cinnamon rolls on Christmas morning?  Me too!!  Do you want to wake up 3 hours before everyone else in order to make that happen?  Me either!! 

These rolls are perfect!  Wolverine is in remission from his Cinnabon Addiction and these have helped him stay on the wagon. I think I only make them twice a year (once each for Ze-Ra and Wolverine's birthday) but they are so easy I could make them every weekend and not think twice.  

I know the recipe looks really long, but I tried to provide pretty clear directions...clear as mud anyway.  You should definitely give these a try - and if you do, let me know what you think!!  I'd love to hear it! 

Overnight Cinnamon Rolls

What's In It:
Dough:
4 lrg egg yolks, room temp
1 lrg whole egg, room temp
1/4 c sugar
6 T melted butter
3/4 c buttermilk*, room temp
4 c all purpose flour
2 1/4 t instant dry yeast (1 package)
1 1/4 t salt
1 T oil
Filling**:
1 1/2 c packed brown sugar
1 1/2 T cinnamon
Pinch of salt
2 T butter, melted
Icing:
3oz cream cheese
3 T milk
1 1/2 c powdered sugar

What To Do With It:
Whisk egg yolks, whole egg, sugar, butter, and buttermilk.  Add approximately half of the flour with the yeast and salt.  Continue whisking until combined.  Remove the whisk attachment and replace with the dough hook.  Add remaining flour and knead on low speed for 5 minutes.  Dough should be soft and moist but not sticky.  Add more flour if necessary.  Knead on low 5 more minutes.  Turn dough out onto a lightly floured surface and fold over on itself a few times.  Oil the mixing bowl with the oil.  Return the dough to the bowl, cover, and allow to sit until double in volume, about 2 to 2 1/2 hours.

Combine the sugar, cinnamon, and salt in a bowl.  Set aside until ready to use.

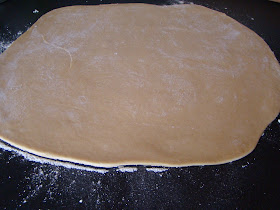
Butter a 9x13 glass baking dish.  Turn dough out onto a lightly floured surface.  Gently shape the dough into a rectangle with the long side facing you.  Roll into an 18x12" rectangle.  Brush dough with the melted butter, leaving a 1/2" border on the edge furthest from you.  Sprinkle filling mixture over the dough, leaving a 3/4" border on the edge furthest from you.  Gently Press the filling down into the dough.

Beginning at the long edge nearest you, roll the dough into a tight cylinder.  Firmly pinch the seam to seal and roll the cylinder seam side down.  If necessary, very gently squeeze the cylinder to create an even thickness.

Using a very sharp knife, cut the cylinder into 1 1/2" rolls, this will yield 12 rolls.  I do not measure the thickness of my rolls.  I just cut the cylinder in half, then each half in half, then each quarter into thirds.  I now have 4 sections of 3 pieces and that's 12...wow math is great! :)

Arrange rolls (place end pieces cut side down) in baking dish.  Cover tightly with plastic wrap and store in the refrigerator overnight or up to 16 hours.

Prepare Icing by whisking the cream cheese until smooth and then adding vanilla, powdered sugar, and milk. I make this the day I make the rolls and store in the fridge.

When ready to bake: Remove the icing from the fridge, remove the lid, and place on stove or other warm area.  Remove the rolls from the refrigerator, remove plastic wrap, and place in the oven (the oven is off).  Fill a shallow pan about 2/3 full with boiling water and set on the rack below the rolls.  Close the oven door and allow the rolls to rise until they look slightly puffy - approximately 30 minutes.  Remove both pans from the oven.

Preheat the oven to 350 degrees F.

Bake rolls until golden brown, usually about 30 minutes.

Allow rolls to cool just slightly and then drizzle with icing.

*I make my own buttermilk and just take 1 T of lemon juice per 1 scant c of milk.  Allow it to sit for about 10 minutes and then use just as you would buttermilk.

**If you'd like to adjust the filling ingredients, I have done so and it has not affected the outcome.  I've changed the sugar volume, I've added nuts, etc.  Make them your own!

I hate it when the recipe is photo heavy, so here's a list of the photos below:
 After rising
 Rolled Out
 With Filling
Rolled Up
 Sliced
Pretty! 

I don't have a photo of them baked - we got so excited...we ate them all for Ze-Ra's birthday breakfast when we were in Atlanta. I'm making them Christmas morning, so I'll have a picture then....but if you make them before then, send me a pic and I'll put it up! 

Wednesday, December 19, 2012

Foaming Hand Soap

You know how a certain company (or two) makes the foaming hand soap?  I don't know about you, but I LOVE that stuff! I love seeing the bubbles and I know it is 100% in my head, but I feel like it gets my hands cleaner.  :)
But WOW that stuff is expensive!  I mean I can get a 3 pack at Sam's for $7, but with as often as people wash their hands in this house, that goes quick!  Also, I constantly worry about all the chemicals that are assaulting my family, particularly the little members, and if you look at the ingredient list, it is a little scary.   So, what do I do?
Dr. Bronners! I LOVE this stuff!  I bought a liter of it a month and a half ago for $15 and I use it for so many things and I have still only used about 1/3 of the bottle. :)

Homemade Foaming Hand Soap

What's In It:
1/2 T Dr. Bronners (use your favorite scent)
Water
Empty Foaming Soap Container

What To Do With It:
Fill soap dispenser with water (leave some head space for the pump to be reinserted).  Add soap.  Replace pump and shake.


Jalapeno Cheddar Cornbread

Is your corn bread getting a little "ho-hum"?  Give it a little kick in the pants with this super easy recipe from Hispanic Kitchen!  You can use any cornbread recipe or box mix that you'd like, but I'll give you our recipe in case you need one.
We ate this with venison chili on Early Christmas.  Not your traditional Christmas meal I know, but man was it GOOD!  Te-Man ate 2 slices :)

Jalapeno Cheddar Cornbread

What's In It:
1 1/2 c shredded cheddar
1/2 c chopped pickled jalapenos
1/2 c chopped sweet red pepper*
1 ear of sweet corn (approx 1 c)
1 cornbread recipe or mix, prepared

What To Do With It:
Mix all above ingredients. Bake according to recipe directions.

*If you want it extra spicy, you could leave out the red pepper and use an entire cup of jalapenos

Cast Iron Skillet Corn Bread

What's In It:
1/4 c crisco or lard
1 c yellow corn meal
1 c all purpose flour
2 T sugar
4 t baking powder
1/2 t salt
1 c milk
1 egg, beaten

What To Do With It:
Place crisco in a large cast iron skillet (I use my 10 or 12").  Place the skillet into the oven and preheat it to 400 degrees F.  While the crisco is melting, combine all dry ingredients in a large metal bowl.  
Once crisco is melted, tilt pan carefully to coat the bottom and then pour melted oil into bowl containing dry ingredients.  Add in milk and egg.  Stir to combine.  Pour back into the hot skillet.

Bake 18-25 min or until toothpick comes out clean.


Where does your food come from?

I have always been an advocate for animal and environmental rights.  I feel that it is our responsibility as human beings to take care of every single thing, living and non-living, on this planet.  It's almost like the line from spider-man - with great power comes great responsibility.

I woke up 9 years ago and I had the sudden realization that I had disagreed with the way animals are raised for meat consumption in this country for years and I had spoken out about it to my friends, family, etc...but I felt powerless to really do anything.  So, I had done nothing.  I was eating that very meat every day.  I was a hypocrite.

From that moment on, I have never eaten another bite of meat that I didn't know where it was raised, how it was raised, and where it was slaughtered.

Yes, I partially do it for my own health.  The likelihood of me, or my family, eating unnecessary hormones, antibiotics, etc is very low.  But for me, it's about the animals.  Yes, I love meat - but I don't love it so much that I am willing to eat it from animals that have been treated in ways that I can not even write about without crying.  Makes me sick.

What do we eat when we go out?  Well, we eat fish or we eat meatless meals.  Does that severely limit our options? Yes, but no more than a vegetarian.

How do we afford it?  Yes, it is quite a bit more expensive than just getting meat from the grocery store, but that's okay because we try to eat more fruits and vegetables anyway, so this just makes sure that the meat isn't always the star of the show.  And, it is awesome knowing that the money we do spend, goes to small local farmers.  In fact, we hand them the money in person.  That feels great!

Feel free to stop here, or you can continue reading the article that prompted this soap-box rant of mine.

Warning....this link contains disturbing material...but maybe that's what people need to make them wake up to what's going on with their food supply.  Do you think this is the only farm where this is happening?  Do you think they'll stop so long as people are buying their meat?  When people start caring about the animals instead of getting meat for $0.99/lb, maybe something will change.

http://www.humanesociety.org/news/press_releases/2010/12/smithfield_pigs_121510.html#.UNC7qzxTnUM.facebook


Joan's Crumble Apple Pie

Super Mom is outta this world - I guess if she wasn't she wouldn't be called Super Mom....but I just wanted to verify that you guys understand the insane level of her awesomeness. :)
She has been making this pie since before I was born and I can tell you there has not been a single pie eater that has gone away unhappy.  :)

Eat it warm, eat it cold, eat it with whipped cream, eat it with ice cream, eat it plain, you could even eat it with cheese.  You will not be disappointed.

Joan's Crumble Apple Pie

What's In It:
9 or 10" Pie Crust
Filling:
2 1/2 lb apples, peeled and sliced
1/2 c sugar
1/4 c flour
Topping:
1/2 c brown sugar
1/3 c flour
1/2 t cinnamon
1/4 c butter

What To Do With It:
Preheat oven to 350 degrees F.
Combine filling ingredients and place into unbaked pie crust.
Cut butter into topping ingredients until crumbly.
Sprinkle topping over filling ingredients.
Bake for 60 minutes.

Tuesday, December 18, 2012

Cinnamon Roll Pancakes

I saw these pancakes from Recipe Girl on Pinterest about a year or so ago and I have been eye-ing them ever since.  
On Saturday afternoon we decided that we were going to have Early Christmas on Sunday - well that didn't leave much time to plan what we were going to eat.  When I asked the Z-Squad what they wanted for Breakfast, they said pancakes....why do I even ask?  The always want pancakes. :)  

Well, even though we all LOVE the Cottage Cheese Pancakes, we wanted to mix it up and I thought - how perfect would these Cinnamon Roll Pancakes be for "Christmas" morning!  

I'd say these pancakes took me about 10 minutes longer than regular pancakes, but now that I've done it once, I'd say they'd only take about 5 minutes longer.  I'd be willing to sacrifice 5 minutes for some cinnamon rolls in the morning. :)
Te-Man Approved

Cinnamon Roll Pancakes
Cinnamon Filling
4 T butter, barely melted - not boiling
1/4 c brown sugar (heaping)
1/2 t cinnamon

Cream Cheese Glaze
4 T butter
2 oz cream cheese
3/4 c powdered sugar
1/2 t vanilla

Pancakes
1 c all purpose flour (+ more if needed, I need an extra 1/2 c)
2 t baking powder
1/2 t salt
1 c milk
1 egg, lightly beaten
1 T oil (I used olive, but an use veg or canola also)

What To Do With It:
Prepare Cinnamon Filling - Stir together all ingredients and pour into a sturdy ziploc baggie.  Set aside.

Prepare Cream Cheese Glaze - Melt butter over low heat until completely melted.  Turn off heat and whisk in cream cheese until it is almost smooth.  Add powdered sugar and vanilla and stir until smooth.  Set aside.

Prepare Pancakes - Whisk together dry ingredients.  Add liquid ingredients and mix until combined.  Mine was not as thick as I'd like, so I added flour until it was my preferred consistency, that ended up being 1/2 c.

Cook Pancakes - Heat a large skillet or griddle over medium heat and grease.  Using approximately 1/4 c scoop, add batter to the pan.  Pancake should spread to roughly a 4" circle, if necessary, use spoon to spread out pancake batter.  Grab the cinnamon filling bag and mix well by squishing the bag in your hand.  Be sure it is well mixed!

When pancake begins to form bubbles, snip the corner off of the baggie and starting in the center of each pancake, pipe the filling in a spiral.  Be sure to keep the outermost spiral at least 1/4" from the edge of the pancake.

When pancake is golden brown on the bottom, gently but quickly, flip the pancake.  Cook until the second side is golden as well.

Flip swirl side up onto a plate.  Wipe out pan and repeat as necessary.

Serve topped with Glaze.

Yields 8-9 pancakes.

These pancakes were so fluffy, light, and fantastic!  Even on days when I'm not feeling like it's a cinnamon roll pancake day, this is my new go-to pancake batter.  WOW!

Kale Pineapple Carrot Juice

What to do on those busy mornings when everyone is hungry but there is also so much to get done?  Get your juice on!

We've started juicing again recently and I feel the same way I do every time we pick it back up...why did we stop?!  It is so delicious and make you feel so great!

We normally try to have more vegetables and less fruit, but it was Christmas after all....and I thought that for Early Christmas first breakfast, a beautiful green smoothie was appropriate. :)

This makes enough for 3 glasses but if you have a baby sniping out of your glass, you might need to make more. :)

Kale Pineapple Carrot Juice

What's In It:
6 large kale leaves
1/2 medium pineapple
4 carrots
4 medium apples

What To Do With It:
Juice it baby! 

We've found that with the Kale, if you stack 3-4 leaves on top of each other, roll them into a tight tube long ways, then juice them on low, you'll get the most juice out.

I have some more pineapple in the fridge and I'm hoping for some cucumbers in this week's reclaimed produce so I can make some cucumber, pineapple, cilantro - that stuff is like an addiction for me! :) Fingers crossed! :)

Package Presents

This year I decided I wanted to do something a little different for wrapping the presents.  I saw this on, wait for it....Pinterest! :) haha. Of course.  Well, I thought it was awesome and just had to find a way to do it myself. :)
Now, this was a project that I had grand plans for, then was ticked off that I'd gotten this far into it and met brick wall after brick wall, wanted to quit, got pretty irritated, pushed through, and was THRILLED with the results.  Just goes to show ya that the Super Parents knew what they were doing when they taught me to finish what I started.  Great job guys and Thank You!  :)
There are plenty of vintage stamps available for purchase on Etsy or Ebay, but when you're a procrastinator like I am, that might not always be a viable option.  Instead, you have to go to google images, do some image hunting, dress them up in your favorite photo editor program, print them out on some fancy shmancy sticker paper, and put your paper cuter to work! Sometimes you just gotta take things into your own hands. :)
 As for the red and white striped twine - I went to six - SIX - stores to find it and was still empty handed.... well, I gave up and settled on the red and white ribbon.  I'm still a little disappointed that I never did get the twine.
I'm also a little disappointed that I didn't get the postage stamp stamp.  I looked at only 4 different stores for that one.  I wasn't even able to find a blank one online - I did find a bunch that had the north pole on them, but I'm not on the presents are from Santa wagon, so I decided to just use a different type of "to/from" sticker.   I found the one I used here - Vintage Shipping Label.
My goal was also to use freecycled paper bags - I thought, what a great way to reuse those paper bags!  But unfortunately (or maybe fortunately) not many people have paper bags these days.  So instead, I headed over to Aldi and picked up some there for five cents each. Couple that with the half price ribbon, all in all, I spent about $8 on all of my wrapping paper supplies this year.  Not too bad when you think about how pricey that fancy wrapping paper is. :)


Saturday, December 15, 2012

Chai Tea Cookies


Wolverine and Wiley Kat are Chai Tea fanatics!  I saw CupCakes and KaleChips' recipe the other day on their Facebook and I KNEW I would be making them.  What I wasn't sure of is whether or not I'd be able to smuggle any out of the house for Wiley Kat.  ;)

These are so good - just crunchy little morsels with a hint of Tea Tastiness.  YUM!

Thank you Wiley Kat for coming to the rescue with your Tea Stash :)

Chai Tea Cookies

What's In It:
2 c all purpose flour
1/2 t baking powder
1/4 t salt
contents of one Chai tea bag*
1/2 c butter, room temp
1 c sugar
1 egg
1 t vanilla extract


What To Do With It:
Combine dry ingredients in a bowl.

Using an electric mixer, cream butter and sugar on medium to high speed for 3-4 minutes or until light and fluffy.

Add egg and vanilla, mix well.  Slowly add the flour mixture and mix until the dough just comes together.

Wrap dough in plastic wrap and chill until firm, at least an hour.

Preheat oven to 325 degrees F.  Remove dough from the fridge and roll out to about 1/4" (or a little thicker for a slightly chewier cookie) and cut into desired shapes.  

Bake for 10-15 minutes or until golden.  

Cool and frost with your favorite frosting.  I made our favorite and mixed in another pouch of instant chai.  

*I used an instant tea package.

I will absolutely be making these again and I will also try using different tea flavors to keep things mixed up!


Thursday, December 13, 2012

Stain Remover

I would like to take a moment and publicly apologize to my stain remover.  I shouldn't have doubted you.

I was in a flurry of making my own cleaners the other day because it seemed like at all once everything was down to the bottom of of the bottle.  No problem, I'll make up fresh of everything (in less than 15 minutes) and I'll take pictures to show all of you.  

Well, I'd never made stain remover before.  I've always just purchased it and with pets, kids, a garden, and lots of experimenting around here, that can get expensive - quick!  And besides the cost, who knows what kind of craziness is in there....and the fact that it was an aerosol made me die a little inside each time I used it.  I know they are supposed to be safe now with no fluorocarbons and what not, but I remember in grade school the huge campaigns to get everyone to stop using them....that stuff stuck with me I guess. 

So I do a little research and people seem pretty pleased with this blue dawn and hydrogen peroxide mixture. I have an extra spray bottle laying around - I think....I'll give it a whirl [Home Alone, anyone? :) ]

When I first mix it up it is blue.  I am thinking to myself, won't this just leave blue soap everywhere? So I test it out on a mud stain by the back door.  And yes, yes it does leave a blue soapy mess in the carpet.  I then proceed to "rinse" it out of the carpet with water.  :(
By this point, I have been working on my science experiment for far too long and it must come to an end.  It was time to take off my mad scientist coat and put on my mama hat.  Under the cabinet the stain remover goes and I'll deal with that later.

So later ends up being 2 days ago and Te-Man has decided to paint his clothing with dry erase markers.  The speed at which children can go from happily drawing to graffiti artist is startling.  

Almost an entire tide pen and 3 washes later, the orange marker just will not come out of his cute little swishy pants. :(  What do I do....certainly not give up - I'm on the Z-Squad! ;)  Ah Ha! The stain remover....let's give you a try.  I pull it out of the cabinet and it's clear?!?!?!  MAGIC ;)  

Well,  I don't know if it's magic, but it WORKED - his pants are marker free!  It has since worked just as well as the store bought garbage on the carpet and the couch (I told you we were messy).  

So maybe when the stain remover in your cabinet is empty, give this guy a shot.  Just be sure to spot check for color fastness - the hydrogen peroxide makes me a little nervous about maybe taking the color out of stuff.  

Homemade Stain Remover
What's In It:
1 Part Blue Dawn
2 Parts Hydrogen Peroxide

What To Do With It:
Mix together in a large spray bottle.  Wait until the solution turns clear to use.  

Brussel Sprout Bacon Pasta

Ho Lee Cow

This stuff was so good!  We had it last week and it's going to be back on the menu this week! YUM!

Wolverine says, "Now THIS is how you can get me to eat my brussel sprouts!". :)  Happy to oblige, sir. :)

And...it's beautiful to boot!

Brussel Sprout Bacon Pasta

What's In It:
1/2 lb spaghetti noodles, cooked
1 lb brussel sprouts, trimmed and thinly sliced
1 14oz can/jar artichokes, drained
6 slices bacon
1/2 c parmesan cheese
Salt and Pepper

What To Do With It:
Cook bacon until crispy.  Set bacon aside and crumble.  Add the brussel sprouts to the bacon grease that is left in the skillet and saute for 3-5 minutes. Add the artichokes and continue cooking for 2-3 more minutes.  Season with salt and pepper.  Add cooked pasta to the skillet and top with parmesan cheese.  Toss to coat.

*Note:  I did not get tapped by the fairy wand when they were passing out pasta tossing skills.  When recipes say "toss to coat" that pretty much means me flopping around a huge glob of pasta in the bowl... unsuccessfully trying to get the "goodies" to decide to hang out with the pasta.  It's like an 8th grade dance in that bowl.

This pasta does not have a sauce and so there wasn't much to "lubricate" the noodles, maybe our bacon just wasn't very greasy, but the next time we make it, we were talking about making a butter/white wine reduction sauce to go with it.  It doesn't need it, trust me, but we were talking about playing around with it and seeing if it could go from great to crazy awesome!

Fruit and Yogurt

Don't you LOVE it when you're at Sam's or Costco and they are giving out samples?

The other day they were handing out yogurt samples - I'm not sure the brand exactly, but they were definitely marketed to the youngins and I of course, checked the nutrition label.  Over 30g of sugar in each little cup.  Seriously?!  That's insane!  It was the first time Te-Man had eaten store sweetened yogurt and to my surprise he didn't show much more interest in it that he does at home.

What does that tell me?  All of that extra sugar isn't necessary!

>Insert long rant about sugar....blah blah blah<

I'm not saying that our family is the epitome of health and that we only eat healthy foods.  What I am saying is that I can tell you > 90% of the food we eat does not come out of a box or a can which means I can control everything that's in it, and I feel pretty good about that.

This is a simple way to make sure you are in control of the amount of sugar in the yogurt your kids are eating.

Fruit and Yogurt

What's In It:
2-3 c Full Fat Plain Greek Yogurt
1/2 t vanilla extract
1-2 c Fruit of Choice, frozen or thawed
Sweetener (optional)

What To Do With It:
Blend fruit until pureed.  Mix into yogurt, add vanilla.  Play with the fruit to yogurt ratio until you are satisfied with the flavor.  Add sweetener if desired.  

I know the recipe is vague, but that's kind of on purpose.  I like to keep yogurt in the fridge because I use it for so many things.  And we are always looking at fruit that's about 3/4 eaten and I know that in a day or two I'm going to have to throw it out and I HATE throwing food away.

So, I've started freezing the fruit on a cookie sheet and putting it in baggies.  I can then take the fruit out when I want a smoothie or some yogurt and I don't have to worry about what kind of fruit I have on hand.  I do this with berries, bananas, pineapple, cantelope, mangoes, cranberries, grapes, etc.  I can then mix and match for any flavor I want.

I'd say that in a full 3 cups of yogurt we only add maybe a tablespoon of honey - but you can play with that too.  Probably in the beginning you'll want more and then over time you can start to gradually cut it back and no one will notice. :)

Wednesday, December 12, 2012

This **** is BANANAS, B-A-N-A-N-A-S


Roasted Garlic Potato Bread

Smokey Mountain Smoked Bacon

Sharp Cheddar

Reclaimed Tomato

Vidalia Onion

Bibb Lettuce

Duke's Mayo


Best BLT EVER!

8 More Diapers!

Whew...I have been busy!

 Check out all these bad boys!

 Stop on by Honey Bee Bottoms to see them all.


:)