Visit us on Hyena Cart

Tuesday, July 23, 2013

HH Plant Based Blueberry Muffins

Did I mention that I LOVE Lindsay over at Happy Herbivore?  I am not kidding when I say that every recipe I've tried of hers is FANTASTIC! Seriously people, Julia Child and Martha Stewart should step aside, because this lady has GOT IT!

These muffins are phenomenal.  I mean, pay $5 at Starbucks without thinking twice good.  I think they are, in fact, the best blueberry muffin I have ever had.  They are a little sweet, a little chewy, more dense than a cupcake - but in a good way!

Excuse me, I'm going to have to go wipe up the drool from my keyboard, be right back. ;)

Maybe I'll whip up a batch of these while I'm in the kitchen and then give myself a high-five for being totally awesome! :)

HH Plant Based Blueberry Muffins
What's In It:
1 1/2 c wheat flour
1/2 c oats
3 t baking soda
1/4 c brown sugar
1 t cinnamon
1/2 t ginger
1/4 t salt
1 c unsweetened applesauce
1/4 c maple syrup
1 T lemon juice
3/4 c frozen blueberries

What To Do With It:
Preheat oven to 350 degrees F.  Line a 12 muffin, muffin tray.
Whisk dry ingredients together.  Add wet ingredients, stirring until completely combined.
Fold in frozen blueberries.
Divide between 12 lined muffin cups.  Sprinkle with extra oats and brown sugar if desired.
Bake 15-23** minutes.

*I don't buy baking powder and I've been out of cream of tartar for a month, so I improvise a bit and use 3 teaspoons of baking soda and a tablespoon of lemon juice.  I don't know how this recipe works using the originally called for 2 t baking powder and 1 t baking soda, but I'm sure it's awesome! :)
**The original recipe says to bake them for 15-18, but mine always take at least 22, so I'd say use your best judgement on the temperament of your oven.  It's always easy to add more time! :)

Saturday, July 20, 2013

Ladies and Gentlemen....are your paintbrushes ready?

Because we are about to get our PAINT ON! :)

I had tons of random pieces of wood in the garage that were driving me crazy...but the hoarder in me couldn't throw them away - so I had to find a use for them.  In comes pinterest. :)

The projects were all super simple and I did all three of them in about a day and half and that's only because I had to wait for paint to dry. :)

I'm sure you've all seen this one online - I LOVE it! :)

This one I painted based off of something I found in a magazine years ago and I kept the page this whole time....I decided I just needed to DO IT! :)  It hangs in our kitchen right next to our back door. :)

These I made this past fall for Halloween.  I am too much of a cheap-skate to buy Halloween decorations, so I made a few of my own...I think they looked pretty cute out there with the pumpkins and gourds. :)
I just free handed everything - but it was so fun!  I put tea-lights inside of the mason jars and they looked great!


Then this last one I think is my favorite.  We each have a name board - I screwed little eye hooks into the top edge and then it just sits on 2 nails in the board.  I did try to make my own chalkboard paint, which was a HUGE mess - not sure what I did wrong, but my paint was the consistency of play-dough.  I made sure I added the exact amounts and then....who knows what happened, but I totally went with store bought.  :)
Anyway, it is so fun to see what Ze-Ra and Wolverine write on here! And I see everyone check it in the morning when they come downstairs. :)

I would love to see your craftiness!!!  Feel free to post away on the Facebook Page or even send me an email and I can post it if you'd like! :)

Thursday, July 18, 2013

Kid's Table Cover

My Grandpa was a wood working magician.  He was the most good-hearted man I have ever met.  He was a salt of the earth farmer and could make everything from china cabinets to benches to wall-hanging crescent moons to my personal favorite...Bunny Furniture!
 

I'm not sure if he saw this pattern somewhere or if he created it, but either way, this stuff is hand made, stained, and painted.  Each of my Aunt's have one and each of us grandkids does as well. I remember being a kid and seeing rows and rows of bunnies hanging to dry from the basement ceiling. :)

So you can imagine this piece of furniture is near and dear to my heart - but I still want my kids to use it....what to do...what to do....

Ah ha! I made some fitted sheets for Te-Man's bed (using this tutorial over at DanaMadeIt) when he was younger (because I refused to pay $40 per sheet for a baby!) and I thought I could use that same idea, but use laminated fabric to make it waterproof.

 Voila!
I am totally thinking about making one using the measurements for a standard picnic table so that when we got to a park or camping we don't have to worry about the table cloth blowing away or remembering clamps/etc. :)

Plush Alphabet

This is the very first thing I ever pinned on Pinterest.  I made these for Te-Man over a year ago and he plays with them quite a bit.  It is fun to choose a letter and go find things that start with that letter or we hold and trace them while we read his Star Wars Alphabet Book.  I also made him a simple little drawstring sack to keep them in.

If I had it to do over again, I think I'd make them a little thicker with either thicker batting or two layers.  Other than that, we love them!

Here's the whole Alphabet and numbers 1-10
Here's a close-up so you can see how imperfect my sewing was...this one is probably the worst - as far as my stitches not even staying on the fabric. Sheesh - I must have been in a rush (or since it's a U, maybe I was getting tired of going all the way through the alphabet! haha). Also, if you have a serger you could serge the edges so they don't fray - but I wasn't going for perfect (clearly!) so I didn't mind the frayed threads.

Also, you can see that the batting is exposed, so like always, watch your kids with these. :)

Here's my Te-Man and Wiley Kat's son enjoying some snacks :)

Tuesday, July 16, 2013

Cave Fort

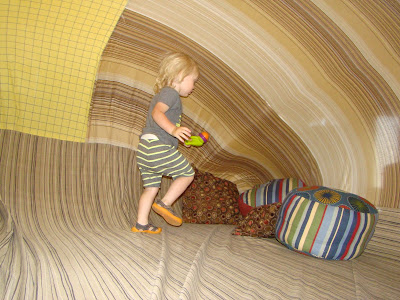
Have you seen the pictures on pinterest of the sheet/fan fort?  It looks pretty awesome and I was thinking that of course, the Z-Squad needed to have one. :)

I went to thrifting and found some sheets - in fact, I got a california king set and 2 flat full sheets for less than $4. :)

Then I went to sewing.

First, I sewed the two full sheets together along their "long" side.

Then, I laid the king sheet out flat on the floor and laid the sewn together full sheets on top of it.  They didn't quite match up, the full sheets were a little longer, but I figured that's ok because the fort will just have more space, so I kind of "pleated" the top fabric...I just folded it over every once in a while to pick up the extra slack so that when I got to the corner they matched up. If you are wanting your fort to be beautiful or your sheets have patterns, you might want to make sure that you have the "inside"sides facing.

Now....just sew 'er up.  You'll want to leave a space of about 3-4' un-sewn at one end to allow access (by people) and to allow room to fit in your fan.  

Spread the fort out, put in the fan, and BAM Instant FUN!!


We had a little picnic, did some reading, even had a small pillow "fight".  Lots of giggles and all kinds of fun memories!


**Of course, any time kids are involved with something like a fan - parental guidance is necessary to protect their little curious fingers! But who wouldn't want to hang out in a fort all day? :)
:)

Monday, July 15, 2013

SuperHero Capes

Have you ever stumbled upon a website and thought to yourself - this person is a GENIUS!!  That is the exact thought I had when I found Vanilla Joy.  I am almost speechless about it because it is just so awesome!   She's on Facebook too!
She has some Superhero Cape Patterns available for FREE and they are AMAZING! Super easy to use, work perfectly, look FANTASTIC, and kids LOVE them!
I have had more than one person tell me (and Wiley Kat) that I should sell them.  I don't think that would be right because I didn't create the pattern, but I can sure share it with everyone!

Every kid needs a cape and who better to make them one, but you?!

Sunday, July 14, 2013

Happy Anniversary Hit Girl!

Yay for wedding anniversaries!  Today is Hit Girl and The Flash's one year anniversary!  Their wedding was awesome (how could it not be with Hit Girl involved!?)  I am so honored to have been a part of their amazing day.

I know I normally don't post on Sundays, but I thought that you all needed to see a few of the beautiful pictures and help them celebrate! :)
HAPPY ANNIVERSARY
Oh my goodness - she is BEAUTIFUL!!!
Ze-Ra doing a little pre-wedding clowning. :) 
 Gotta make sure those pearly whites are sparkling!
 Baby brigade! That's Wolverine and Te-Man on the left, my cousin Captain Planet in the middle (the little one on the far left is also her's), and my sister-in-law Wonder Woman.
 The Amazing Aunt P, her husband the Horse Whisperer, and Cowgirl Bride! :)
 Ze-Ra and Te-Man tearing up the dance floor!  How did I luck out with such photogenic kids?
 Look out....the Te-Man is coming for you! ;)  
Side note...look how much he has changed - I took this photo yesterday!!! Crazy
HAPPY ANNIVERSARY

Saturday, July 13, 2013

Mini Garden Update

Hey hey there! I decided I couldn't wait until the end of the month to show you what's going on in my garden - so instead of taking pictures of all of the plants - I took one of everything I harvested this morning! :)

 And of my helper - of course. :)


Looks like I know what I'm doing this morning....what about you?

German Potato Salad

Alright.  We admit it, we BROKE OUT THE BACON!!!  I have been saving 3 packages.  One to make German Potato Salad and the other 2 to make BLT's.  I couldn't take it anymore and on Wednesday I used up the potatoes I got in the reclaimed produce box and I made the best German Potato Salad I have ever had! :)

When I was browning the bacon, Te-Man was happily playing in the living room and he stops what he's doing all of a sudden, whips around towards the kitchen and says "Bacon? Bacon! BACON!!!" and comes running full speed into the kitchen and then proceeds to chant Bacon Bacon Bacon until it is done. :)  He ate probably 1/4lb of bacon - it was ridiculous!

So I found this recipe over at A Feast For the Eyes.  Her site is great - you should totally swing over and check her out! I have only made the potato salad, but if her other recipes are only half as good as that one, we'll all be set! :) You should at least swing by and read this touching story about her mom and this potato salad - so sweet! You can also find her on Facebook.
German Potato Salad
What's In It:
1 1/2 c red onion,  finely chopped
1/2 lb bacon, browned and finely chopped
5lb potatoes, boiled, skinned, and sliced 1/4" thick
2 c vinegar*
2 T bacon grease
1 t dill, heaping
1/2 c rice vinegar
1/4 c vegetable oil
1 t sugar
1 1/2 t kosher salt
1/2 t freshly ground black pepper

What To Do With It:
Combine all ingredients together, gently.  If you can, skin and slice the potatoes while they are still warm so they soak up more of the seasonings.  Allow to set at least 30 minutes before serving and serve at room temperature.

*I used white but if I'd had red wine vinegar, I'd definitely have used that.

Friday, July 12, 2013

Black Bean & Corn Salsa

Man oh man.  You know those recipes that your family has been making for years and yet every time you have it, your mouth is just like YES! :) This is one of those recipes.  We eat it on chips, in tacos, in enchiladas, over rice, when we used to eat eggs, it makes a mean omelet...can't say I've ever eaten it on anything and didn't like it. :)
It's so simple - but I think that's what makes it awesome! We just had it for dinner Thursday night over some wild rice from the Organic Market in town.  It is fantastic!  Also - this has nothing to do with the salsa, but one of the guys that works at the market told me that you can cook the rice covered in the oven for an hour and it turns out perfectly - he isn't kidding! So easy and I have a rice cooker but I usually leave it in the cabinet and I like to have as few things on the stove as possible if I'm not in the kitchen full time....don't want little Te-Man to burn his fingers.  I just throw in a little poultry seasoning, garlic powder, onion powder, and some good old S&P. And it is phenomenal! :)
Well, back to the Salsa - make this!  And make some of these Corn Tortilla Chips to eat it on. :)  YUM!

Black Bean & Corn Salsa
What's In It:
1 red pepper, chopped
1 yellow pepper, chopped
1 green pepper, chopped
1 red onion, chopped
1 qt sized bag of corn*
2 cans black beans, rinsed and drained**
1/2 c olive oil
1/2 c vinegar
3 limes or lemons, juiced (approx 1/3 c)

What To Do With It:
Combine all vegetables and beans.

Whisk oil, vinegar, and juice together.

Toss to mix.

Can be eaten immediately, but it tastes so much better if you let the flavors combine for a few hours.

*About 3-4 cups.  You can use canned, but go for the higher quality corn - it makes all the difference.
**I use homemade black beans and I use 3 heaping cups.

Thursday, July 11, 2013

Plant Based Apricot Fig Bars

Sometimes you just need a nice gooey dessert.  To be honest, I'm not a big dessert person, but there is that odd occurrence when I just want to sink my teeth into something luscious.  Now....sometimes I want that to be a piece of chocolate cake the size of my head, but for the most part - I'm a fruit girl.  These Apricot Fig Newton Bars fit the bill perfectly!

They have just enough fig to remind you a little of fig newtons, but enough apricot to make them feel a little grown up.  I can't really remember if the kids got more than one each of these - I think Wolverine and I scarfed them down before they got the chance. :)  

I see these in my future again very soon....I've even been saving a half a bag of figs in my cabinet for these! :) I think I might even change up the "other fruit" in these to maybe strawberries or peaches...thinking I could sub in some homemade jam for the dried apricots and syrup....I'll keep testing it and see what we like!

Have you guys been over to see Chelsea at Whole New World?  She has some great recipes and a generally fantastic site!  Swing by and say hello - you can even find her on Facebook!  
Apricot Fig Bars
What's In It:
Filling:
1 1/2 c (8oz) dried apricots, roughly chopped
1 1/2 c (8oz) dried figs, roughly chopped
1/4 c 100% maple syrup
1 T finely grated orange zest
1/4 t ginger
1/4 t cinnamon
1/4 t salt
2/3 c water

Dough:
3 T ground flaxseeds
1/4 c plant based milk
1/4 c unsweetened applesauce
1/4 c almond or peanut butter
1/3 c dry sweetener (I used raw sugar)
2 t vanilla
1 c oat flour
3/4 c whole wheat flour
1/2 t baking powder
1/2 t baking soda
1/2 t salt

What To Do With It:
Preheat oven to 350 degrees F.  Line a 7x11 pan with parchment paper (If you don't have a 7x11 you could also use an 8x8 or a 9x9, but adjust your baking times a bit).

To make the filling
Combine all filling ingredients in a small sauce pan and bring to a boil over medium heat.  Reduce heat to simmer and cook 15 minutes or until fruit is tender, stirring occasionally.  Remove pan from heat and puree.  I used an immersion blender, but if you don't have one, you can use a blender, just be sure you don't put the lid on tightly or it will blow off.  

To make the crust:
In a large bowl, stir together the flaxseeds, milk, applesauce, nut butter, and sweetener.  Mix well and stir in vanilla.   Add remaining ingredients and stir well to combine.  Knead with your hands a few times until it all holds together - add an extra bit of milk if necessary.  You want the dough to form into a ball.  Divide the dough into two balls.

To assemble the bars:
Place the first ball of dough into the bottom of the pan and using a spatula (or your fingers) spread the dough to evenly cover the bottom of the pan.    
Spread filling over crust.  
Shape or roll the second ball of dough into an 8x8 square (or the size of the pan you are using. I had to actually roll it out with a rolling pin between greased sheets of parchment paper.  It was a mess, but totally worth it!). Gently place second crust on top of the filling.
Bake for 20-24 minutes - the top should be firm and starting to turn golden at the edges.  
Allow to cool completely on a cooling rack before cutting into squares.  

Yields approximately 12-16 squares.    

Wednesday, July 10, 2013

Whoa! Reclaimed Produce is CRAZY!

So I haven't been very good about taking pictures of the reclaimed produce.  Things just got busy and I just got....well not lazy....but busy doing other things and arranging produce nicely on my table was just not at the top of my priority list.  I think you guys will forgive me?

We have been picking it up twice a week every week - unless we are out of town.  And I can not even begin to tally the hundreds of dollars we have saved!  Look at all the produce I hauled in yesterday!

It was so heavy that twice people asked me if I needed help getting it into/out of my car and I had to haul it into the house in our wagon!

I am currently listening to the peppers being pickled in my canner, I am cooking black beans (with the onions) in my slow cooker for black bean and corn salsa (to use up the red and orange peppers), the potatoes are boiled for German Potato Salad, the pickles and green onions are waiting to be sliced.  The grapes, strawberries, and cantaloupe are half gone already, the broccoli will be going into some stir fry with some squash, and the spinach will be blended to be added to smoothies and what not.

What am I going to do with all that squash though?  Have a recipe I can't live without because I feel like I can live without yellow squash. haha. :)

Have you reclaimed any produce?


Monday, July 8, 2013

Corn Tortilla Chips

These chips are FANTASTIC!!!  They keep for at least 3 days (I say at least because they have never lasted longer than that so I can't attest to a longer time!), they are seasoned however I want, crazy easy, they are not fried, but they are crispy as all get out!

Load them up with your favorite salsa - I'll be posting my new favorite one later this week - or guac or refried beans, or cauliflower and lentil taco mixture, or all of the above and dig in!!!  :)

I don't think I'll ever buy a bag of tortilla chips again!

Corn Tortilla Chips
What's In It:
10 corn tortillas
Oil (I use olive)
Seasonings (I use garlic salt and chili powder)

What To Do With It:
Stack tortillas (I cut all 10 at once, but you can do as many or few as you are comfortable with), and cut into 6 wedge shaped pieces - I cut in half and then make two more cuts at angles like a pizza.

Place on cookie sheets, it's okay if they touch a little, but don't have them overlap.  I lay them in alternating rows and I can fill 2 cookie sheets exactly with 10 tortillas worth of chips.

Pour a little oil into your hands, maybe a teaspoon.  Pat your hands onto the tops of the chips to get a little oil onto each one.

Sprinkle with seasonings of choice. You could even do a cinnamon and sugar coating and use these with a fruit salsa.

Bake at 375 degrees F for 8 minutes, rotate pans and bake for an additional 6-10 minutes.  Watch the chips the second half - the brand of chip and it's thickness will greatly influence the time it takes to cook.  They need to only be lightly browned - if they look like toast, they are burnt.

Allow to cool a bit before eating - they get crispier as they cool.


Saturday, July 6, 2013

Are you ready for June's Garden Pics?!

What?!  Another post of garden pictures?  Yup....you better believe it.  It's 0900 and Te-Man is still sleeping.  I can't believe it.  I am here typing with a nice hot cup of coffee and 2 dogs curled up at my feet - flowers blooming, garden growing, birds chirping (but not eating my tomatoes)....a full day of canning ahead of me.  Life is GOOD!!!

I thought this was a post about garden pictures? :)  Here ya go. :)

Sweet corn and sunflowers
1st Bell Pepper of the year!
 Banana Peppers
 Tomatoes! I decided I didn't want to have to buy 40 tomato cages and I procrastinated too long to have time to make my own, so we went with fencing stakes and para cord.  It is working wonderfully! Well, except for the Sun Gold Cherry tomatoes, but nothing can contain those crazy tomato plants, I had them as tall as my garage gutters one year!
 Cauliflower
 Beets and cucumbers
 Jalapenos
 Jalapenos
 Cauliflower
 Limas! and the Okra is still there on the left as well
 Onions!
 Radishes, kale, and carrots
 Lettuce, Kale, and Radishes
 Candy Roaster Pumpkins, lemon balms, sage, lavender, collards
 Tomatoes, jalapenos, cabbage
 Candy Roaster Pumpkins, mint, rosemary, thyme, lettuce
 Candy Roaster
 Peppers, Lettuce
 
 Kale, Basil, Thai Basil, and Chocolate Mint
 A Candy Roaster!!!
 Thank you Mr. Bee
 Lemon Grass (I re-rooted these from some lemon grass I bought at the farmers market.  I just placed them in a glass of water for about 2 weeks, changing the water every other day, then planted them in the pot, kept them moist, and WOW!)
 More Lemon Grass
 A lonely tomato of unknown variety....I just couldn't throw him away.
 I harvested my onions! Not as many as I'd hoped, but still a good showing for my first year and growing in the cruddiest soil ever.  Well, not ever, but compared to what I'm used to, I pretty much just walked up and planted these on sand dune.  
 My garlic...drying on my front porch like I'm all uncivilized and such.  None of the neighbors have complained...maybe that's because I am keeping them steadily supplied with radishes and tomatoes. :)

Have I mentioned how much I LOVE my garden! I would like to take a minute and personally thank Wolverine for putting up with my craziness....the constant dirt under my fingernails, the constant weird green hand prints on our back door and muddy footprints in the kitchen, the plants, seeds, and seedlings that always seem to be EVERYWHERE in our house and yard.  For never complaining that I bought another plant or more dirt or more seeds, etc etc etc.  For listening to my constant crazy plans for the garden or what I want to do next year, or fretting over the weather....I think the delicious bowls and bowls of fresh veggies that come in from the garden on a daily basis make it worth it for him, but a good thank you never hurts either. :)