Visit us on Hyena Cart

Monday, January 28, 2013

Peanut Apple Butter Bites

When you go a little out of your head with the excitement of fall and all the beautiful apples and buy 3 bushel for your little family of 4, you end up with a LOT of apple butter, apple sauce, apple jelly, apple pie, etc etc etc.  :)

What to do with all that apple butter?  Well, I'm so glad I found this recipe and THANK YOU Crazy for Crust, because this is certainly a keeper. :)

Everyone is a HUGE fan....me and my crunch obsession would like to tweak them a bit to see if I can make them crunchy, but don't let my psychosis stop you from giving these a try - everyone DEVOURS them - I've had probably 6 or so! :)

Apple Butter Bites

What's In It:
1/2 c peanut butter
1/2 c apple butter
1 c graham crackers, crushed
1/2 c crushed nuts 

What To Do With It:
Mix peanut butter and apple butter til smooth.  Mix in graham crackers.  Chill for approximately 30 minutes.  

Roll into balls.  

Roll balls into crushed nuts.  

Refrigerate.  

Saturday, January 26, 2013

Reclaimed Food Week #4

You can never have too much produce - at least we can't here at the Hive!. :)

Gotta love all the goodies this week!

Tuesday 1/22
You should see Ze-Ra devour those mangoes - they are all gone already!  And Te-Man has made pretty fast work of those Carrots and oranges.  As for the salads, those were gone in less than 24 hours as well.  The mushrooms, well some went into this Venison Pot Pie and the others are being saved for Spaghetti! 

Thursday 1/24
All of that beautiful lettuce and those peppers will very soon be turned delicious salads - yum!

Have you called your grocery store yet?  

Friday, January 25, 2013

Pickled Beets - Challenge 2013 Recipe #3

Wanna know a secret?  Until I made these beets, I had never had a pickled beet before.
The whole idea just is not at all appealing to me.  But, as I've said quite a few times on here - I LOVE being wrong, especially about food - especially beautiful jewel toned, food.

These were super simple to make and I can't say that I'll be jumping at the chance to eat them everyday, they were SO MUCH BETTER than I thought they'd be.  I can actually see myself reaching for them occasionally.  ;)

DIY Test Kitchen Pickled Beets*


*I can't find a link to the recipe and I'm not comfortable posting recipes out of the cookbook online - so I'll keep checking back periodically and I'll update this post if I can find a link.

Banana Coconut Upside Down Cake

I am a Sucker (with a capital S) for those $1 bags of bananas at the grocery store.  And really...they are awesome.  We go through bananas like nobody's business, but why do I buy so many! :)  I was in need of a way to use up those bad boys and I just wasn't feeling banana bread or banana pudding and I already have a ton in my freezer for smoothies....so....Banana CAKE! 
Wolverine, Ze-Ra, and Te-Man just couldn't get enough.  It was gooey and sweet and just really different than any cake I've ever had.  

Needing to mix it up this weekend?  Need the perfect cake to go with your Pina Colada on Saturday?  This is it!  I think we should all mix up some umbrella drinks, grab our suits, and head out to the pool (and pretend we aren't getting freezing rain and ice today).  Who's with me?! 


Banana Coconut Upside Down Cake
Original Recipe Here
What's In It:
1 yellow cake mix
3 eggs
1/4 c oil
1/2 c sour cream
1/2 c water
6 bananas, sliced 1/4" thick
1 1/2 c shredded coconut
1 c brown sugar
1/2 c butter
2 T lemon Juice

What To Do With It:
Preheat oven to 350 degrees F and grease 2 8" round cake pans.

Beat together cake mix, eggs, oil, sour cream, and water until smooth.

In a small sauce pan over low heat, melt butter.  Add brown sugar and lemon juice.  Heat and stir until sugar is dissolved.  Pour into baking dishes.

Place bananas in a single layer on top of the brown sugar mixture.

Sprinkle with coconut.

Pour batter into pans.

Bake 35-40 minutes or until a toothpick comes out clean.

Allow to rest for about 5 minutes before inverting.

Thursday, January 24, 2013

Unbelieveable Cheese Cake

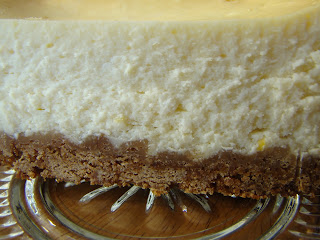
Have you ever made something and been literally speechless about how fantastic it was?  It sure doesn't happen to me often, in fact, I think this is the only time.  I made this cheesecake for Wolverine's birthday last year and WHOA!

I'm not a big cheesecake fan, they all taste just blah to me.  Either the texture is wrong, or the flavor is off, or it's got some horrifying mixture of fruit and chocolate....but Wolverine - cheesecake is his favorite.  And I want my man to be happy - so I searched high and low for the perfect cheesecake recipe to mess up make for his birthday.

I have never, never, been so impressed with myself.  I literally sat there the entire time I was eating my slice just waiting for it to suddenly be terrible.  I mean, cheesecake isn't...good.  Is it?

Then I made it again....I even made it by halving the recipe and making it in a 7x7 ceramic baking dish....and it was still phenomenal!!!  WHAT?!

So now it's my turn for a birthday, and I can't find the bottom to my springform pan!!!!...the last time I saw it was in a hotel just before a 3 week camping trip this past June...and we've moved since then.  I can't find it in the camper and it's not in my cabinets.  So...I used 2 loaf pans.  hahaha.

Whatever, I don't need my food to look pretty - especially when it tastes so good! 


Unbelievable Cheesecake
What's In It:
15 Graham Crackers or 1/2 Recipe Homemade Graham Crackers, crushed 
6 T butter
2 T sugar

4 8oz pkg cream cheese
1 1/2 c sugar
3/4 c milk*
4 eggs
1 c sour cream or greek yogurt
1 T vanilla
1/4 c all purpose flour

What To Do With It:
Preheat oven to 350 degrees F. 
Mix crushed graham crackers, butter, and 2 T sugar.  Press into the bottom of a greased springform pan.
Beat cream cheese and sugar just until smooth.  Using a spoon or a spatula, blend in milk, then add eggs one at a time - mixing just until incorporated.
Mix in sour cream, vanilla, and flour.  
Pour filling onto prepared crust. 
Bake for 1 hour, turn oven off.
Leave oven door closed and allow to rest for 5-6 hours.  
Chill.  

*I wanted some lemony goodness for my birthday so I only used 2/3 c milk and filled the measuring cup to 3/4 with lemon juice.  I also added the zest from 2 Meyer lemons....and YUM!

Wednesday, January 23, 2013

Venison (or Beef) Pot Pie

The weather here in NC is a little bit like it was in the midwest....if you don't like it, wait a day or two and it will change. :)

That's so true here!  It was 70 degrees on Monday and then Tuesday it was 45.  What the heck is that?!  Well, with weather like that all I want is pot pie.  The Super Parents are coming this weekend and they are staying for week!!!  YAY!!!  They are bringing some venison to replenish the dwindling supply in my freezer, so I thought I'd go ahead and use the last coveted package of venison chops - I'd been saving it, but knowing more is coming makes me feel better about using it. :)  Oh...did I mention how amazing my parents are?!  :)

This was phenomenal.  Ze-Ra almost burned her mouth because she was too impatient to let it cool.  Even Te-Man was getting in on the "mmmm's". I ate enough to feed a horse - which is about how hungry I was yesterday. :)

This recipe makes 2 pot pies, but it would be easy to half the recipe if you aren't interested in making such a large amount. :)

Venison Pot Pie
What's In It:
2 T olive oil
1 1/2 lb venison, cubed
2 lb potatoes, diced
1 lb mushrooms, diced
1 lrg onion, diced
24 oz mixed frozen veggies, thawed
2 carrots, diced
4 stalks celery, diced
1 t onion powder
1 t garlic salt
1 t poultry seasoning
1/2 t mustard powder
2 t steak sauce
1 t pepper
1 t worcestershire sauce
2 bay leaves
6 c water
1/4 c corn starch

4 9" pie crusts

What To Do With It:
In a large pot, heat oil over medium high heat.  Sear meat on all sides.  Add 3 c water and spices.  Bring to a boil, then reduce heat and simmer, covered for 90 minutes.  Remove bay leaves.  Add 2 c water and potatoes, onions, carrots, and celery.  Bring back to a boil, reduce heat, and then simmer for 30 minutes or until veggies have reached desired tenderness.  Stir in mushrooms and mixed vegetables.  
In a small container, shake 1 c water and corn starch until smooth.  Stir into stew mixture and simmer until desired thickness is reached.  

Roll out 2 pie crusts to approximate shape of baking dishes (I used an oblong 10x7 and a rectangular 11x8).  Place one pie crust in the bottom of each baking dish.  

Pour half of the stew mixture into each dish.

Top with remaining pie crusts.*    

Bake for 45 minutes at 375 degrees F. 

*At this point I freeze one for later use.  If I remember, I allow it to thaw in the fridge the day I am going to cook it - but either way, I tent it with tin foil for the first 20-25 minutes and increase the baking time by at least 20 minutes.  

Monday, January 21, 2013

Overnight Steel Cut Oats

Do you like eating oatmeal?  I do, too.  Do you like feeding your family a more nutritious option than quick oats?  I do, too.   Do you like spending 45 minutes cooking steel cut oats for your family in the morning?  I don't, either.  What to do....What to do....

Here's the answer! Overnight Steel Cut Oats.  Start to finish, including clean up, I'm done in less than 15 minutes.  Say what?!  15 minutes....that's fantastic!

Overnight Steel Cut Oats
What's In It:
1 c steel cut oats
4 c water
pinch salt

What To Do With It:
Bring all ingredients to a boil over medium-high heat (can use high heat if you're willing to commit to stirring it pretty frequently).  Boil for 3 minutes.  Remove from heat.  Cover and allow to sit on counter overnight, then refrigerate.  When you're ready to eat, heat through, add your favorite oatmeal toppings, and serve.   

TA DA!

I normally transfer the oatmeal to a storage container and wash my pan right away that night.  I can then, in the morning, scoop out what I need and put the rest straight into the fridge.  I often make a double batch and it will be good in the fridge for a week, maybe longer....just doesn't last around here. :)

Saturday, January 19, 2013

Zucchini Bread

This has been one of my favorites since I was a wee one.  I have never found another Zucchini bread that tastes even close.  If you use butter (what else would you use, right?) to grease your loaf pans, the edges get a delectable crispiness to them....and I will fight you for that end piece. ;)
If you're feeling really frisky, try it warm with a layer of luscious butter - and if you aren't too busy getting yourself a second slice, you'll thank me. :)
Do you think the fact that the zucchini was free makes it taste better?  I might have to eat an extra slice just to be sure. ;)

Zucchini Bread
What's In It:
3 eggs
1 c brown sugar*
1 c oil
1 t vanilla
2 c grated zucchini with skins
2 c flour
1 T cinnamon
2 t baking soda
1/4 t cream of tartar
1 c nuts, chopped (optional)

What To Do With It:
Preheat oven to 350 degrees F.

Beat eggs, sugar, oil, and vanilla until thick.  Add remaining ingredients and beat until smooth.

Pour evenly into 2 greased loaf pans and bake 45 min - 1 hour or until a toothpick comes out clean.

Allow to cool in the pan for about 10 minutes, then turn out, and cool on a wire rack.

*The original recipe calls for 2 c white sugar, but in an attempt to reduce the sugar, I go with 1 c brown sugar.  To be honest, you really can't tell the difference and I figure an entire cup less is awesome!

Reclaimed Food Week #3

Have I told you how completely kick butt it is that I get free food?  I LOVE IT! :)

Tuesday was only one lonely head of cabbage - but that's okay, I used it to make these fantastic Tuna Quesadillas!

Tuesday 1/15

Thursday's box was busting at the the seams!  WOW!  We had lots of salads this week, I'm trying a new type of cole slaw, and I even turned some of that delicious zucchini into some Zucchini Bread. :)

Thursday 1/17

Friday, January 18, 2013

Roasted Green Beans

Let's keep our simple foods day going with some super easy roasted green beans.

We get a LOT of green beans in our reclaimed food boxes - which is awesome!  But I sometimes look for different ways to use them...I thought about roasting them just like I do these beautiful Carrot Coins.  I'm so glad I did!

Roasted Green Beans
What's In It:
20 oz Green Beans, frozen and thawed or fresh*
2 T Olive Oil
1 t Garlic Salt 
1 t pepper

What To Do With It:
Toss green beans in olive oil and spread onto a lined cookie sheet.  Sprinkle with seasonings.  Bake at 400 degrees F for about 30 minutes, stirring half way through.  Once you get to 30 minutes, watch carefully for desired donenes.  I wanted them to be a little "charred" in places and it took me about 10 more minutes.

Please note....Te-Man does not like green beans.  They are in fact the only food he has ever spit back up - but he was eating these like hot cakes! I could barely get them on his tray as fast he was eating them!  Wolverine said maybe we should take him in and have him checked out.  haha. :)

*You could try this with canned, but I haven't.

Tuna Quesadillas

Sometimes I feel like I have too much going on in my life....and then I stop and think that it is 100% self inflicted.  Why do I do that? It's a sickness I think.  I remember before I quit my job, I'd spend my entire day trying to figure out how to do everything in the most efficient way possible....and would I do that so that I could move at a more leisurely pace and still accomplish more than my coworkers?  Nope.  I'd do it so I could take on more responsibility and then figure out how to do even more.

Apparently quitting my job didn't make me quit the driven achiever within.

But sometimes....she needs a break.  So how about today we talk about easy meals, that really take almost no prep and are fantastically delicious?  Sounds like a plan to me.

These reminded me of the Tuna Casserole that Super Mom used to make when I was kid, but with a twist.  That stuff, is like heaven for me.  I don't know that I've ever made it, but it's for sure on my list.  :)

I got the creamy cheesy goodness from the quesadilla, a little crunch from the onions, peppers, and cabbage, and a little kick from the hot sauce.  Nice

Tuna Quesadillas
What's In It:
4oz cooked tuna, shredded
3/4 c shredded cheese
1/4 c finely diced onion
1/4 c finely diced pepper (bell, sweet, or spicy)
8 Tortillas, Fajita size
Shredded Cabbage
Hot Sauce

What To Do With It:
Heat skillet or griddle over medium high heat (you know your skillet and grease as necessary).  Divide ingredients (except hot sauce and cabbage) among 4 of the tortillas.  Top with remaining tortillas.  Place tortillas in skillet (in batches if necessary) and cook until toasted on the bottom (3-4 minutes).  Flip and toast on the other side (3-4 minutes).
Using a pizza cutter, cut into desired slices.  Serve with shredded cabbage and hot sauce.

Thursday, January 17, 2013

Turkey Noodle Dumpling Soup

It was 80....80!!! this past weekend and then the past three days it has been raining and about 50 degrees.  I'm not complaining, other than the blizzard in Southern Illinois over Christmas, this is about as close to winter weather as we've seen this season.

What better food to celebrate the chill in the air (if you can call 50 chilly) than soup.  I brought home some left over turkey from Christmas and I've been saving it for just this occasion.

Why is it called Noodle Dumpling soup?  Well, I have these dumpling noodles from the Mennonite market and I've been wanting to try them for probably over a year.  You know what that tells me?  I do not make chicken/turkey and dumplings nearly enough.  Now that I think about it, I think I only made it once when I was a sophomore in college and it was a colossal disaster.  I need to step up to the plate and give homemade dumplings another go.  But in the mean time, these noodle dumplings were fantastic!  I had noodle dumplings once in high school and these were even better!

Let's just get to it shall we - I already had 2 humongous bowls, but I might want another one after I'm finished typing this. Just kidding, I'm stuffed, but if I had room, I'd eat some more for sure! ;)

Turkey Noodle Dumpling Soup
What's In It:
1 1/2 c Carrots, sliced about 1/4-1/2"
1 c Celery, sliced about 1/4-1/2"
1 medium Onion, diced
2 heads garlic, roasted and smashed
3/4 t poultry seasoning*
1 t salt*
1/2 t mustard powder
1/2 t onion powder
1 t pepper
8 Small Red Potatoes, about 1 - 1 1/2 lb
1 1/2 c Turkey or Chicken, cooked and diced or shredded
2 T Butter
6 c Water*
8 oz Noodle Dumplings
1 1/2 c Milk

What To Do With It:
Saute carrots, celery, onion, and garlic in butter over medium heat for a few minutes or until fragrant.
Add spices and cook a few minutes longer.
Add potatoes and water.  Bring to a boil, reduce heat, and simmer approximately 20 minutes or until potatoes are just less than tender.
Add noodle dumplings and cook according to package directions (I stopped about 2 minutes short just so the noodles didn't fall apart when I stirred the soup).
Add milk and meat - heat through.  Adjust seasonings if necessary.

*I didn't have any broth on hand, so I had to improvise.  If you have broth, omit the poultry seasoning and salt.

A Day in the Life of Te-Man

I was feeling very picture happy yesterday and I thought I should share a little of yesterday's fun here at the Hive.  It was rainy and gross, as it has been for DAYS.  What's today's forecast you ask?  Rain, 100% chance.  Yippee! :)

Seriously though, here's some of the fun we had yesterday.

During our morning walk, we did a little singing in the rain

Then after lunch, Te-Man took a glow bath


Followed not long after by a nap with his snuggle buddy, Mr. Frog (SuperMan actually gave me that frog in 5th grade!)

We rounded out the evening with a lively rendition of "I Wear My Sunglasses at Night", which Te-Man rocked.


I obviously didn't capture everything, but did get a few of the highlights.  I sure do love that little dude. :) 

Wine Jelly - Challenge 2013 Recipe #2

Wine Jelly....probably not my first choice from the jelly shelf in our fridge - but neither is pepper jelly and you know what - it should be! I LOVE that stuff...I just didn't grow up with it and it doesn't tug at my heart strings like the jam/jelly from my childhood.  This wine jelly is going to be added to the "Why don't I eat this more often?!" list.

It's beautiful, it's sweet, but it's also so grown up.  I'm going to be 31 on Saturday...does that make me a grown up yet?  Most of the time I don't think so...but I still like to put on my mom's heels and pretend. :)


I again, followed the recipe exactly, except that I think I may have reduced the wine down to a little less than 1/3 c - oops!  But, it set beautifully and tastes fantastic - and that's what matters! :)


Wednesday, January 16, 2013

Operation Movitvation

Do you have a friend that always keep you in check?  Doesn't let you get away with the BS all of your other friends do?

You know how sometimes you wanna just punch them in the throat?  But really what you should do is say THANK YOU.    

This is my thank you to SGT Steve.   I just can't ignore his constant honesty and example of how health plays into your life on all levels.  I figure that if his posts are getting under my skin what they are really doing is making me uncomfortable because I'm not happy with my life choices.  

 I HATE New Years Resolutions.  I think they are a waste of time because if you're really interested in bettering yourself, really changing your life - you'll get started anytime, no matter what day it is.  That day for me was last week Wednesday.  I had one of those epiphany moments when you ask yourself, what am I doing?
I was Primal and doing P90X for over 2 years and LOVED it! I felt amazing all the time.  I have a million excuses for why I stopped, but I won't bore you, or myself, with them - they don't matter.

All that matters is that I want to feel that way again.  I'm not going to go fully primal, but I am committed to making myself feel better again and that starts with what I put in my body.  (Don't worry I will never go low-fat on you and I can not live without excitement and flavor!)  I know that the most important thing I can do for myself and my family is to eat foods that are full of vitamins and minerals and I also know that I can make that happen while keeping them tasting amazing! 

I am back on the P90X (1 & 2) wagon.  I have been doing it again for a week and I LOVE it.  The way you feel after a work out makes you feel like a Super Hero.  

So between eating better, working out, and taking Roland on 3 miles worth of walks each day in our crazy hilly neighborhood - I think I'm on the right path to really getting healthy again.   

Do you need help getting started or do you need a little motivation to keep going?  Would you just like to be a part of a group of real people being honest about life?  SGT Steve is your guy.  You can find him on Facebook and you can also get his BOOK (paper or kindle).  You really should read his book.  He's so funny but also serious about no BS, no Excuses, it's time for you to take charge of your life and decide what it is you really want.  

Then get it.

Lemon Marmalade

You know those Meyer Lemons you are seeing everywhere right now?  Well, next time you're out, grab a bag or two!  
Then make this amazing marmalade!  I am a lemon junky, but this stuff is fantastic!  So....I've got the marmalade, who's bringing the blueberry scones? :)
Lemon Marmalade
What's In It*:
Meyer Lemons
Water
Sugar
1/2 t vanilla
1/2 t salt

What To Do With It:
Wash the lemons and cut the ends off. 
Quarter the lemons and remove the seeds.
Place the lemons into a food processor and pulse until desired consistency.  Transfer to a non-reactive pot (I used enameled cast iron).  As your transfer, measure the amount of fruit and for each cup of fruit, add 2 cups of water.  
Bring to a boil and boil vigorously for 20 minutes.  
Let sit, covered, in a cool place for 24 hours.
Again measure the amount of fruit mixture that you have, add 1 cup of sugar for each cup of fruit mixture.  Add vanilla and salt.
Bring to a boil, stirring almost constantly.  Using a candy thermometer, boil until temp reaches 220 degrees F.  
While still hot, ladle into canning jars.  
This can be canned in a water bath for long term storage if desired.  

*This recipe is adaptable to whatever amount of lemons you have.

Tuesday, January 15, 2013

Orange Marmalade - Challenge 2013 Recipe #1

I don't know if you know this about me, but I'm not very techno-savvy.  I do not own an i-pod, I don't know how to use i-tunes, and I don't even have a single song on my phone....but days like marmalade making day last week.... I sure wish I did.  I wanted so badly to be blasting Lady Marmalade, twirling around my kitchen, singing into a spoon....all while I was cooking away in the kitchen! :)
I was a little nervous about making my first recipe from my challenge, but I decided to just jump on in and my my my....the water is fine and delicious to boot! 


I followed the recipe exactly (that's part of the Challenge 2013 right?) and this stuff is seriously good!  The first and last time I had orange marmalade I was 18 and it was in one of those tiny little jars at a restaurant....it was terrible.  I can honestly say that if not for this challenge, I would not have even thought of trying it again.  I can't believe I've been missing out on this my whole life! 

I hope the rest of the recipes come out this great because this was a heck of a way to start off the Challenge! :) 


Monday, January 14, 2013

Broccoli Patties

Wanna know how I get Te-Man to eat broccoli?  It wasn't easy, that boy has an extreme aversion to green foods (except peas)....but he can't get enough of these little bad boys!

He's not the only one that can't get enough....  I usually make a double batch of these and try to keep them in the freezer...not many make it in there though....no matter how many I cook up - they always all disappear!

I hope you give these a shot - they are super easy and so worth it!
Broccoli Patties
What's In It:
1 large potato, cubed
1 c broccoli
1/2 c shredded cheese
1/2 t salt
1 egg
1/4 t garlic powder
1/4 t onion powder
1/4 t poultry seasoning
1/2 t pepper
3 T bread crumbs*

1/2 c bread crumbs*
3-4 T oil

What To Do With It:
Steam the potatoes and broccoli until tender, cool slightly.  Mix with cheese, egg, seasonings, and 3 T of crumbs.  Roll approximately 2 T of mixture into a ball shape, repeat until all mixture is used. Roll the balls in the remaining crumbs and slightly flatten into a patty shape.

At this point, you can freeze them on a cookie sheet and then save them until ready to be used.  

When ready to use, heat oil in a skillet over medium heat.  Pan fry 3-4 minutes on each side until golden.

*You can be very creative with your bread crumbs.  I almost never have any in the house and if I do, never enough...so I'll crush up some crackers or some chips and go from there.


Saturday, January 12, 2013

Bread & Butter Pickles

What to do when Produce Guy gives you almost 7 pounds of cucumbers?  Make Bread & Butter Pickles!!!

I didn't want to go to the trouble of canning the pickles, so I searched through my recipe box until I found this one.  I've had it in my box for awhile now....and I'm not sure where it came from, but if it is you....thank you!

The pickles are crunchy and the flavor is spot on.  The only "complaint" I might have is that I wish I'd have given the cucumbers a second rinse because the brine was slightly saltier than I'd like - that being said...it was only noticeable when eaten plain.

I have eaten these on a hot dog and in potato salad - both....spot on!

Bread & Butter Pickles
What's In It:
4 lb pickling cucumbers, cut into 1/4" slices
1 lrg onion, thinly sliced
6 T pickling salt
4-5 c crushed ice
1 1/2 c sugar
3 c cider vinegar
2 T mustard seeds
2 t celery seeds
1 t ground ginger

What To Do With It:
Toss cucumbers, onions, and salt together.  Layer in a large non-metalic bowl alternately with the ice, ending with ice.  Weigh down with a heavy plate.  Chill overnight.
In non-reactive pot (I used an enameled cast iron dutch oven) combine sugar, vinegar, mustard seeds, celery seeds, and ginger.  Boil for 3 minutes, remove from heat, and allow to cool slightly.
Remove any un-melted ice from the cucumbers and drain.  Rinse thoroughly, twice.
Pack cucumbers and onions into mason jars (I used 5 pint size).  
Pour pickling brine over the cucumbers.
Refrigerate until ready to serve.

Reclaimed Food Week #2

WOW....there is not a day that goes by that I do not stop and think about how blessed I am.  I have a beautiful family, I have amazing friends, I have more than I could ask for in all areas of my life.

This week, my kitchen was overflowing with fruits and vegetables!  I was even able to share some with a great friend!

 Tuesday 1/8

Thursday 1/10

Friday, January 11, 2013

Garam Masala Slow Cooker Chicken

I have only made Indian food one other time and let's just say it wasn't amazing, but it was good enough to encourage me to try again. :)
This recipe was SO EASY and made my house smell incredible!  I will definitely be making it again :) 

The yogurt is completely optional, but it makes the sauce so nice and creamy.  If you want to lighten it up, you could leave it out and it would still be amazing! 
Garam Masala Slow Cooker Chicken

What's In It:
2 lb chicken*
12 oz diced tomatoes, drained well
1/2 lrg onion, diced
3 cloves garlic, minced
1/2 t ginger
1/4-1/2 t cayenne pepper
1 bay leaf
1/2-3/4 c chopped cilantro leaves**
1 c Greek yogurt (Optional)

What To Do With It:
Mix all ingredients except yogurt and cilantro.  Place in slow cooker and cook on low 6 hours.  Remove bay leaf, add yogurt and cilantro, test for seasonings and adjust if necessary.   

We served this with Roasted Carrots and Broccoli and Rice.  We spooned the sauce over the rice and it was phenomenal.

*I used skinned chicken leg quarters, I think next time I'll use boneless just because the chicken falls apart when you serve it. What a problem to have, right? ;) 

**I apparently lost my head when I was making this and just used a huge handful...I am still not used to measuring everything!  I'll get there, I promise.  Thank you for your patience! 

Homemade Garam Masala

Remember all that talk about me being a cheap a** frugal....well, there is no way I am going to spend $7 on a jar of spice at the store, especially when I have all the ingredients at home!  

I made this in seriously 5 minutes.  It was super easy and delicious! :) 

Homemade Garam Masala
What's In It:
1 T cumin
1 1/2 t coriander
1 1/2 t cardamom
1 1/2 t pepper
1/2 t cinnamon
1/2 t cloves
1/2 t nutmeg
1/2 t caraway or anise seed

What To Do With It:
Blend together in a food processor or coffee grinder.
Store in an air tight container (I use a mason jar)

Thursday, January 10, 2013

Pina Colada Popsicles

There is no possible way I can complain about the weather here.  It has been so nice that every couple of days, we are outside playing in T-shirts and even when it is "cold" it's only about 35-40....that is insane compared to the Northern Illinois winters we are used to!  I can't believe it's January to be honest.

It doesn't matter if you live in the Great White North or the Deep South, sometimes you just need a little beachy summer breeze added to your day.  Well, this popsicle is definitely a way to do it!  It is soooo good!  My Te-Man was gracious enough to share his with me (what a sweetie!!) and I could almost feel the sunshine! 

Pina Colada Popsicles
What's In It:
1 package Coconut Cream Instant Pudding
2 c cold milk
1/2 c shredded coconut 
1 20oz can pineapple, drained

What To Do With It:
Place pineapple and coconut into a blender or a food processor, blend until desired consistency (I didn't want huge chunks of coconut) adding milk as desired to aid in blending.  Add remaining ingredients and blend/process till smooth.  

Pour into popsicle molds and freeze....well, until frozen. :)

Better bring a wash cloth....it could get messy ;) 

Homemade Hot Sauce

I am on a quest to find a hot sauce or a taco sauce that I LOVE!  This one is fantastic!  It's so good, I eat it like a salsa with chips!  I also eat it on eggs, tacos, quesadillas, chili, etc, etc, etc. :)

I love eating it warm fresh from the stove but it 's even better once it has sat in the fridge for a day or so.  Enjoy!


Homemade Hot Sauce

What's In It:
1/2 c sliced pickled jalapenos
1 jar pickled banana peppers (mild or hot)
1/2 large onion
1/2 t garlic powder or 1 head roasted garlic
3 8oz cans tomato sauce
2 8oz cans water

What To Do With It:
Blend all ingredients except the water in a blender.  Pour into a large pot, add water, and boil for 30 minutes.  Cool and store in the refrigerator.

*If you'd rather use fresh peppers, you can use 4 small or 3 large jalapenos and 11 banana peppers.  If using fresh peppers, take 2 T of water out and add 2 T vinegar.

Wednesday, January 9, 2013

Pumpkin Butterscotch Muffins

This muffin is, without a doubt, the best muffin I make.  I feel kinda speechless about it.....well, almost.  Just know that whatever I say, I will not be doing this muffin the justice it deserves.  

It is just as delicious and moist as it is different and unexpected.  I have been making these muffins for probably 15 years....I wish that made me feel accomplished in the kitchen, but really it just makes me feel ancient.  Haha.

If you only make one recipe from this silly little blog, make it this one.  Seriously, please do me a favor and make these - then share them with someone....you'll all be happy you did! :)   

Pumpkin Butterscotch Muffins
What's In It:
4 eggs
2 c sugar
16 oz pumpkin puree (canned or fresh)
1 1/2 c vegetable oil
3 c flour
2 t baking soda
2 t baking powder
1 t cinnamon
1 t salt
12oz butterscotch chips

What To Do With It:
Preheat oven to 400 degrees F.
Beat eggs, sugar, pumpkin, and oil.
Combine flour, baking soda, baking powder, cinnamon, and salt.
Slowly add flour mixture to pumpkin mixture.  Mix well.
Fold in butterscotch chips.
Pour into lined muffin tins and fill 1/2 - 3/4 full.
Bake 16-20 minutes.  Cool in pan 10 minutes then cool on wire racks.

This makes quite a few muffins.  I get 30 regular size muffins and 24 mini muffins out of just one batch. 

These also get really soft and kinda weird if you keep them in a closed container.  I find the best way to keep them is with the lid kinda kicked to the side just a bit.  And really, they are so good, you're going to eat them all and won't need to worry about storage....so hopefully you followed my advice to give some away, that way you only eat half of a batch. ;)     

Tuesday, January 8, 2013

Montessori Button Snake

I saw these on pinterest forever ago and I've been making them for about a year now I guess.  They are super simple and super cute!

The idea is that kids can practice their buttoning skills on something other than their pants or shirts (really it is unfortunate how infrequently most kids wear button down shirts these days).  I was also thinking you could make different color games out of them, different hues of the same color, teach the rainbow, etc.

I have made a few of these, and a few snap-a-zoos as well, and I'm going to be sending some to my cousin who is a physical therapist - I was thinking that it might be fun and different for the little ones that they help.

Montessori Button Snake

What's In It:
Felt
Ribbon
Button
Thread/Needle

What To Do With It:
Cut your felt into squares of any shape you desire.  I went with 1 1/2" squares, but I think some shamrocks, hearts, stars, pumpkins, etc would be awesome! 

Fold each piece of felt in half and snip a slit in the center of each piece of felt.  No specific size, just make sure the ribbon can easily fit through.

Cut ribbon to desired length.  I find that including the snake tale, about 10" is good.

Sew a button onto one end of the ribbon.

Thread felt on the ribbon.

Sew the last piece of felt to the ribbon in a coordinating thread color. Alternately, you could sew a second button on instead.  

Mel's Potato Soup

What is better after a long day than a steamy bowl of soup that with every bite you ask yourself why you don't make it more often!?  This is that soup.  I only make it two or three times a year, but when I do, I eat it non-stop until it's gone.

I LOVE this soup!
Mel's Potato Soup

What's In It:
1 medium onion, diced
2 celery ribs, diced
2 T butter
2 c broth
3 medium potatoes, peeled and cubed
1 1/2 t sugar
1 t salt
1/2 t garlic powder
1/2 t dried rosemary
1/2 t dried thyme
1/2 t pepper
1/3 c flour
2 1/2 c milk
1 c cubed ham or bacon (optional)

What To Do With It:
Saute onion and celery in butter.  Add broth, potatoes, sugar, and seasonings.  Bring to a boil, then simmer for 15-20 minutes or until the potatoes are tender.

Combine flour with 1/2 c milk until smooth in consistency - I shake mine in a small plastic container.  Add flour/milk mixture to soup.  Return to a boil and cook 2 minutes, stirring constantly.  Add remaining milk and meat if using, heat through.

I usually serve this with a nice artisan bread and a salad.  I've also eaten it with a little shredded cheddar on top - it's not required, but it sure is pretty. ;)

Monday, January 7, 2013

Dehydrated Marshmallows

I don't know if they are magic, but they sure are delicious. :)

To go with our Grape Nut post this morning, I thought I'd throw in some tasty crunchy marshmallows.  I sometimes feel guilty that my kids don't get to eat the cool fun cereal at the store.  I'll buy it a few times a year, but sometimes I worry that they get teased about the food they eat.  This can't/won't stop the teasing, but it can make them feel like their mom is a little less crazy. :)

Now, the next step will be me making homemade marshmallows (I can't believe I haven't done that yet!!!) to dehydrate - that will be something I can feel good about. :)


Dehydrated Marshmallows
What's In It:
1 bag miniature marshmallows

What To Do With It:
Spread marshmallows onto dehydrator trays.  I used 2 trays just to make sure they weren't over crowded.  

Dehydrate at 160 degrees F for 12 hours or until desired crunchiness. The temperature does not have to be exact, so if yours has a higher temp, that would work but would take less time.  Also, if your dehydrator doesn't go to 160 degrees, you could always use a lower temp, but it will take longer.

These are so fun - the kids love them and sometimes I'll throw them into a trail mix just for a surprise. :) 


Attack of the spices!!!

My spice cabinet has exploded and is threatening to take over my entire kitchen!!!

Seriously - we are having clean-a-gedden here at the Hive this month.  The coat closet that was over-flowing onto the arm chair is beautiful - even organized by person - there's even space for extra hangers in case a visitor would actually like to hang up a coat!

Yesterday I organized the cabinets, but wouldn't touch the spices.  That is today's project - anyone have any procrastination ideas? hahaha

Or maybe an organization tip?  I'm thinking about just doing alphabetical order....but then I was also thinking about doing baking/cooking sections....but then what do you do with the ones that overlap?

I'm gonna go take Te-Man and Roland on a long walk and pretend the kitchen fairies will take care of this for me.
:)